Resistance bands are an excellent way to get a full body workout at home without the need for bulky exercise equipment that costs the earth.
But when you want to expand your resistance band training, getting the extra stretch you need to take things to the next level can be difficult. Fixing a band to something helps open up a range of possibilities, especially if you can train with your bands at various heights to work a range of muscle groups.
Using a door as an anchor point for resistance bands is the most effective way to get the most from your training because you can vary the position of the bands to get a full-body workout. However, finding a way to attach them safely can be a little more tricky.
In this article, we’ll show you how to make a quick and easy door anchor in three simple steps using an everyday item everyone has at home. Also, see more door anchor ideas and the best way to position and use them.
Three -Step DIY Sock Door Anchor
We’ll start by showing you the easiest way to make a door anchor using a sock to make the loop you need to secure your resistance band in a door frame.
The beauty of using a sock as an anchor is that pretty much everyone has one at home. They’re soft so that they won’t damage your door and small enough to fit in the door frame.
Once you’ve made your anchor, you can use it repeatedly to anchor your resistance band in seconds.
All you’ll need is a spare sock and a minute or two to get things set up.
Step One: Find the Right Kind of Sock
Using a sock as a door anchor for resistance bands means it will take quite a bit of strain once you start training, so it’s important to make sure you use the right sock to ensure your anchor is safe and secure enough to hold your full body weight.
Here are some considerations to keep in mind when choosing your sock:
- Don’t use your best sock. It will probably get twisted out of shape and stretched and might not be the same again.
- Use a strong sock. Ensure it’s not made of thin material that could tear.
- Make sure it’s long enough. It doesn’t need to be too long, but a short ankle sock would be too short. Aim for a standard-length sock (mid-calf length) that is long enough to tie two knots in with enough space for a loop.
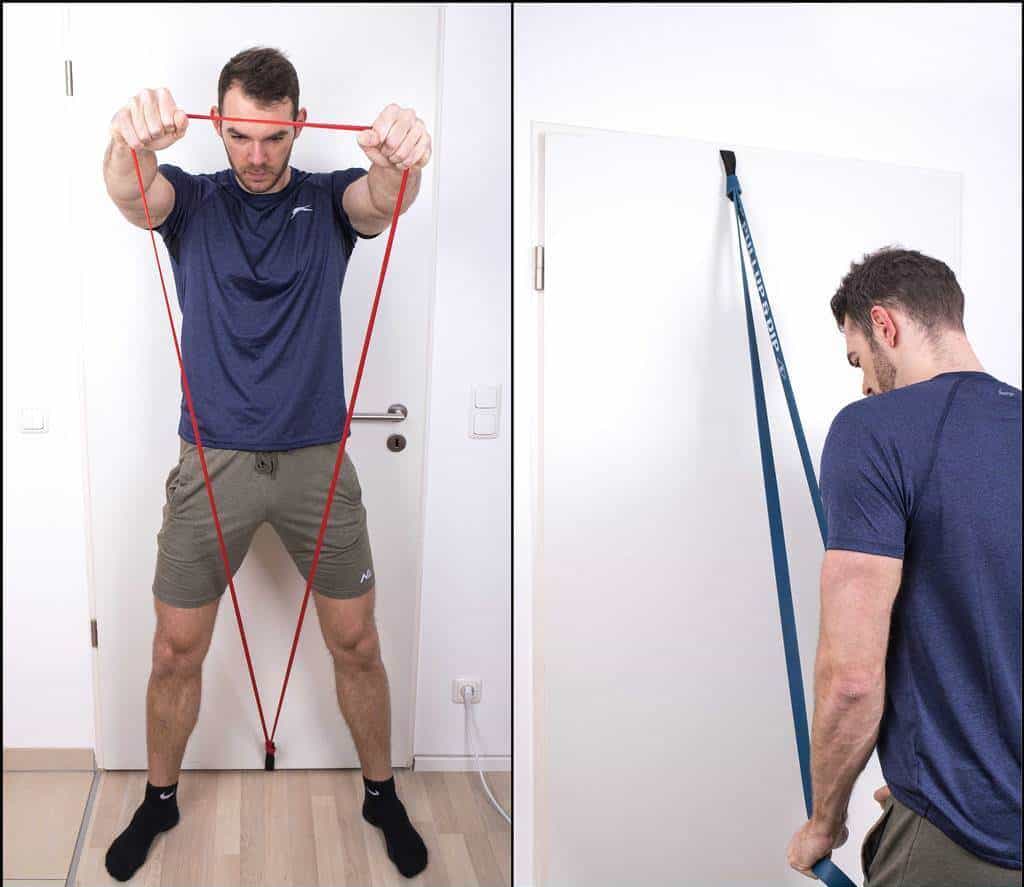
Step Two: Tie Knots
Once you’ve selected your sock, tie a simple knot in one end, making sure you still have an inch or two at the end so the knot can’t slip open.
Tie another knot in the other end of the sock and pull them both tight to ensure they can’t come undone.
You will now have a sock with a knot at each end with enough space in the middle for the resistance band once the knots are closed in the door.
Step Three: Position the Anchor in the Door
Choose the door position you want to anchor your bands from (for tips on positioning, see below).
Open the door and put the two knots on the other side of the frame so when you close the door, you have a loop that you can feed the band through.
If you have a shorter band that you’re not doubling up, you can loop the sock through before closing it in the door.
That’s it! Provided you’re happy that your anchor is safe and secure, you’re now ready to train.
Door Anchor Safety Considerations
If you’re using a DIY door anchor for the first time, here are some important things to do to ensure you’re training safely and so you don’t injure yourself or anyone else:
- Make people aware that you’re training. If anyone walks through the door while you’re mid-training, this could lead to you falling or them being slapped in the face by an extended resistance band, which for obvious reasons could be dangerous. A door sign is always a good idea to ensure nobody enters the room you’re training in or forgets you’re there.
- Check which way your door opens. If the door opens towards you and is fairly easy to open, it could open as you apply your body weight to the resistance bands. To ensure this doesn’t happen, check that you’re training on the side of the door that doesn’t swing open. If you have no choice but to train on the side of the door that swings open, you can reduce the risk of this happening by moving the anchor closer to the hinged side of the door, reducing the force.
- Test your anchor. Before you start using it, give it a good pull in a standing position to ensure it’s secure in the door frame. This is especially important if you pull your full body weight on the bands.
Where to Position a Door Anchor
If you’ve not anchored your resistance bands to a door before, deciding where to position it can be a little confusing.
You can position a door anchor in many places when using resistance bands, and each location will help you work different muscle groups. To perform a full-body workout, moving your anchor position around to vary the kind of exercise you can do is beneficial.
How you position your anchor can depend on the kind of door you have and the type of handle, but in most cases, you should be able to move your anchor to any point in your frame.
Below are the key anchor points to try for different kinds of resistance band exercises:
- At the top of the door frame. This is a great position for exercises where you need to pull down, such as lat pull-downs or kneeing lat pull-downs (depending on the length of your bands).
- Top or middle door frame side. This is the position you would use for exercises where you need to pull the bands outwards, such as chest presses or standing rows.
- Bottom of the door frame side. This is the position used for exercises where you need to pull the bands up towards you, such as bicep curls or low to high wood chops.
You might need to adjust the anchor height up or down depending on your height and the length of the resistance bands. If you’re still struggling to get the right height, you can also try standing further away from the door.
More Door Anchor Ideas
The basic principles required to make a homemade door anchor are that you need a loop for your resistance bands to feed through, it needs to be soft yet secure so it doesn’t damage your door, and it needs to be flat enough to fit through your frame when the door’s closed.
Keeping these principles in mind, there are many ways you can make an anchor if you get inventive, but here are some of the most popular methods that might also work for you:
Door Handle Anchor
If you have a sturdy door handle, you can simply loop your resistance band around the handle on the other side of the door and then close the door, so it’s on the side where you’ll be training.
The downside to this method is that it doesn’t work for all door handle types, and you can only use it for exercises that require a mid-anchor point position. However, it’s fine if you have nothing else to anchor your resistance bands with and you just want a quick workout.
T-Shirt Door Anchor
Another method you can try is to use an old t-shirt as an anchor by following the steps below:
- Take the t-shirt and tie a knot at the bottom of the t-shirt, leaving a few inches spare (or more if you want to reduce the length).
- Pull on the knot to make sure it’s secure.
- Place the t-shirt on the top of the door with the knot on the outer side and spread it out to ensure it fits under the door when you close it.
- Once you close the door, you should be able to see the top part of the t-shirt and the sleeves. Now bring the sleeves together to make one large hole and feed your resistance band through to make your anchor.
- If this makes the anchor too long, try tying the knot further up the t-shirt to shorten the overall length.
- Pull on the shirt to make sure it’s secure, and you’re ready to go.
The downside of this method is that t-shirts can be too bulky for some doors if they don’t have much space between the door and the frame. You could also potentially ruin a good t-shirt, so make sure it’s not one you want to use again.
Scarf Door Anchor
The scarf door anchor works very similarly to the sock anchor in that you need to make two knots to create a loop that you can feed your resistance bands through once trapped in a door.
The key thing to remember if you use a scarf is that the material is strong enough to take the strain and that it’s not too bulky because it might not fit through the frame.
If you don’t have a scarf, you can also use material scraps provided they’re long enough to knot and are the right kind of material.
Avoid using slippery materials or those which won’t knot securely because it could cause the anchor to slip out of the frame.
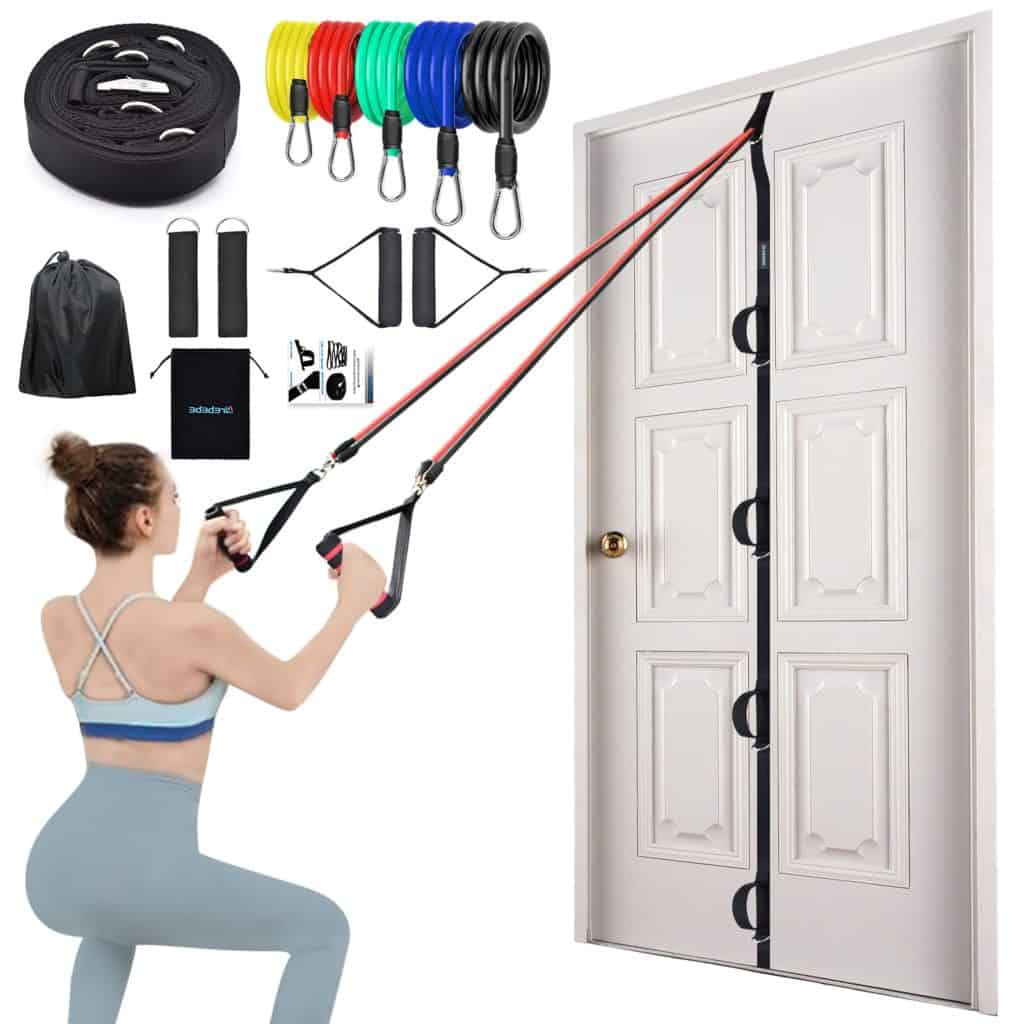
Buying a Door Anchor
If making a door anchor isn’t for you, then there are anchors that you can buy that provide a more permanent solution if you regularly work out with resistance bands.
Some resistance bands come with door anchors, and there are some that you can buy separately, but not all are of the best quality and might be prone to slipping out.
If you’re going to go down the route of buying a door anchor, choose something like the TRX anchor, which is sturdy yet padded, so it will keep you safe and won’t ruin your door.
Look for good quality materials that will last a long time and an anchor that is easy to reposition throughout a workout so you can vary your exercise sets.
What Kind of Resistance Bands Can You Use with a Door Anchor?
There are different kinds of resistance bands, and some work better than others when you’re anchoring them to a door.
The best kind of resistance band to use in a door anchor is a long one that will double up when you pull it through the loop so you can train with both arms.
Some bands come with handles, and some are just long rubber loops, but either kind will work well with a door anchor, providing you have enough length.
The least effective resistance bands are the short loop kind that are usually used around the body to increase resistance in certain moves. Although you can use these for some door resistance training, you might be limited in some moves because there’s insufficient length.
With a short loop, you won’t be able to double up the band, so you might need to train one arm at a time. You’ll also need to loop the sock (or another kind of anchor) through the band before you place it in the door.
Conclusion
We hope this article has given you all the information you need to make a simple door anchor for your resistance band training.
This kind of home-based exercise comes with so many benefits, and best of all, it takes up no space and is virtually cost-free.
However you decide to fix your resistance bands to your door, don’t forget to check it’s safe before you start training!